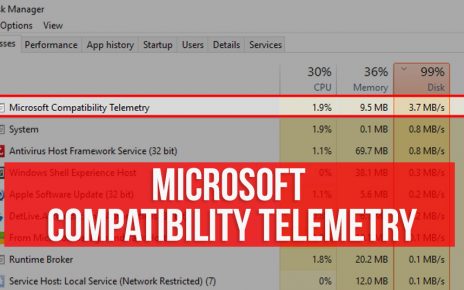
When your Windows 10 PC performs very slowly than it usually does, next it means that some system file running in the background is taking all the resources like the processor or disk of the computer.
The system file in the question here is the ntoskrnl.exe. You can see this system file when the Task Manager is opened. Here, there will be all the information regarding this file. So follow it properly.
What is ntoskrnl.exe?
The Windows NT operating system kernel or the ntoskrnl.exe is an important file of the Windows system. Basically, it is an image file of the kernel that is responsible for many system services like memory management, hardware virtualization to name a few. This file connects the applications with data processing that occurs at the hardware level. The ‘ntoskrnl’ file compresses the pages of memory, thus reduces the RAM usage.
Reasons on why this occurs after All
Here you will get plenty of reasons why the ntoskrnl.exe Windows 10 error occurs after all.
- If the graphics and network card drivers of the devices installed within the computer are not up to date or are corrupt, then this problem can occur.
- If the Windows is not updated at a regular interval, then because of that reason you can encounter this problem.
- When the RAM installed within the computer does not function properly, then also you get this issue.
- Sometimes if some of the system files are corrupt, even then there is a possibility for you to get this error.
- Whenever a process ‘Runtime Broker’ is active, next, you might face this error.
Solutions to fix the ntoskrnl.exe high disk usage Problem
You will get various methods here that will help you to resolve this problem as soon as possible.
1: Inspection of the Hardware
Sometimes it is possible that if a hardware component like RAM within the computer is not installed correctly, then the NT kernel & system high CPU Windows 10 issue may come up. The correct way to fix this issue is to check the RAM stick. To do it, follow these steps below.
- First, open the computer side panel for desktop and access door of RAM for laptop.
- After that, locate the RAM slots and release the hooks that hold the memory stick.
- Slowly and gently pull the RAM stick from the slot and keep them on the side. If there is another RAM, then repeat the previous line to take it out.
- Once the memory modules are out, next, take a lint-free cloth and clean the dirt accumulated on the memory slots.
- Now, take another clean lint-free cloth and remove any foreign particles on the connector slots of the RAM.
- When the cleaning process is complete, next, take the memory sticks and install them properly into the slots and close the access door or the side panel.
- Lastly, start the computer and see if the ‘ntoskrnl’ process still gives a high CPU problem or not.
2: Update the network and display card Drivers
If both the network adapter and graphics card driver is not up to date, then you can face this problem. Now, the best way to get rid of this problem is to perform an update for the aforementioned device drivers. For that to happen, follow the steps below.
- First, press the combination of ‘Windows + R’ keys simultaneously. This action will launch a new dialog box having the title ‘Run’.
- Inside that dialog box, type the following text “hdwwiz.cpl” on the empty space beside the label ‘Open’ and tap on the ‘OK’ button.
- As soon as you click on that button, then a new window having the title ‘Device Manager’ will come up. Inside that window, there will be a list of devices present within the computer along with their respective drivers.
- From that list, locate the ‘Network adapters’ device and double-click on the same to reveal its drivers on a sublist.
- Next, choose the first driver from the sublist and right-click on it. After that, from the popup menu that appears, tap on the ‘Update Driver Software…’ option. This action will open a dialog box with two separate links.
- Out of those two links, choose the one that says ‘Search automatically for updated driver software’. As you click on that link, then the Windows will start to automatically look for updates.
- If there is an availability of an update, then those will be downloaded and installed automatically.
- Repeat the fifth, sixth and seventh steps to update all the remaining drivers on the sublist.
- Now, to update the driver of the ‘Display adapter’ device, follow from fourth to the seventh steps. Once the driver update process is over, next, restart the machine and see if this problem still appears or not.
3: Run the SFC and DISM Tools via Command Prompt
If some of the core system files of the Windows machine have got corrupted, then there is a high chance for you to encounter this very glitch. The only option to resolve this problem is to execute the SFC and DISM tools. Here, get the steps on how to run them.
- First, press on both the keys ‘Windows + S’ together. This will launch a new default search space of the Windows OS.
- Now, in that space type the following text “command prompt”. Then, from the output section of that search locate the option ‘Command Prompt’ and right-click on the same.
- Once a popup menu comes up, next, choose the ‘Run as Administrator’ option. As you click on that option, then a new window having a title ‘Command Prompt’ will appear.
- Inside that window, type the following command – “SFC /scannow” and press ‘Enter’ to run. This command scans the computer for any corrupt system files and replaces them with the correct copies.
- Now, if the previous command runs into an error, then input the following command – “DISM /online /cleanup-image /scanhealth” and tap the ‘Enter’ key. This command also scans the image file of the Windows for any problem.
- Once the execution of the previous command is over, then write another command – “DISM /online /cleanup-image /restorehealth” and hit ‘Enter’. This is the command that restores the image file of the Windows.
- When the execution of all the commands is over, next quit from the ‘Command Prompt’ window and restart the computer.
- At last, when the computer opens up, next, check to see if this problem is still there or not.
4: Deactivate the Runtime Broker
A ‘Runtime Broker’ is a system process like the ‘ntoskrnl.exe’. This process can eat up a large portion of the CPU time. Therefore, the best answer to solve this problem is to disable the ‘Runtime Broker’ process. In order to do it, follow the steps below.
- First, click the ‘Windows’ logo on the taskbar to launch the ‘Start’ menu.
- After that, from the menu that appears click on the ‘gear’ icon above the ‘Power’ icon.
- As soon as you that, then a new window will appear with the name ‘Settings’.
- Inside that window, there will be many setting categories specific to the Windows OS that you can change whenever necessary.
- Now, out of all the categories locate and choose the one that says ‘System’. As you click on that category, then a new page will appear, in it, go to the left pane and tap on the ‘Notifications & actions’ option.
- Next, move to the right side of that page and under the ‘Notifications’ heading unselect the ‘Get tips, tricks, and suggestions as you use Windows’ option.
- Finally, reboot the computer and then check the CPU usage percentage.
5: Scan the RAM with Windows Memory Diagnostic Tool
If there is a Blue Screen of Death error that points to the “ntoskrnl.exe” file, then it can be due to a problematic RAM. The solution to resolve any problems with the RAM, what you can do is to execute it with the Windows Memory Diagnostic Tool. Here, you will get steps regarding how to do it.
- First, locate the ‘magnifying glass’ and tap on the same. This opens the default search area.
- Inside that area, type the text “windows memory diagnostic”. Then, from the search result section find the ‘Windows Memory Diagnostic’ option and click on the same.
- As a new window appears, then locate the option ‘Restart now and check for problems (recommended).’ and click on it.
- Once you tap on that option, next, the machine will reboot and the memory scan process will begin. This process may take some time to complete so wait patiently.
- When the scanning process of RAM gets over, next, the computer will show you the login screen.
- Lastly, you will see the results of the memory scan once you login to the machine.
6: Perform Clean Boot
Since the ‘ntoskrnl.exe’ process takes up almost all the CPU time, and thus makes the computer slow. Therefore, the right solution for you is to perform a clean boot. A clean boot is a procedure to refresh all the system processes that execute within the ‘Services’ application. You will get the steps on how to do a clean boot below. So follow along.
- First, go to the ‘Windows’ logo and right-click on it. This will launch the ‘Options’ list.
- Now, from that list locate and click on the ‘Search’ option. As soon as you click on that option, then a default area will appear.
- Inside that area, type the text “MSConfig” then choose the ‘System Configuration’ option from the search output section.
- When a new dialog box appears with the title ‘System Configuration’, next, click on the ‘Services’ tab. Under this tab, go to the bottom and put a checkmark on the option ‘Hide all Microsoft services’.
- After that, tap on the ‘Disable all’ button. Next, click on the ‘Startup’ tab.
- Within this tab, tap on the ‘Open Task Manager’ link. This action will open another dialog box that has the name ‘Task Manager’.
- In the new dialog box, click on a startup process and then tap on the ‘Disable’ button below the list.
- Repeat the above step for all the startup processes. Once all the startup processes are disabled, next, quit both the ‘Task Manager’ and the ‘System Configuration’ window.
- Finally, restart the computer.
Once the computer boots up, then re-enable the startup programs form the System Configuration window and check which one is giving this problem. When you have got hold of the problematic application then reinstall it.
7: Update Windows 10
If all the six methods above are unable to rectify the system_service_exception ntoskrnl.exe error, then as the last solution what you can do is perform an update of Windows. Gets the steps below, on how can perform an update.
- Hit the combination of ‘Windows + I’ keys simultaneously to launch a new window that has the name ‘Settings’.
- Inside that window, scroll down to the bottom and click on the ‘Update and Security’ category.
- As you click on that category, then a new page will come up with a heading ‘Windows Update’. Under that heading, click on the ‘Check for updates’ button.
- At this moment, Windows will look for any update packages available or not. If there is an update package present, then that will be downloaded and put on a list.
- Once the download process of the update package is over, next, you will get a ‘Restart now’ button below the list, click on it
- When the computer boots up, next, the installation process of the update package will begin. Wait for the installation process to get over.
- Finally, once the installation procedure is complete, restart the computer one more time and then check to see if the “ntoskrnl.exe” file takes up the processor time or not.


